
Whether as a homeowner or as a prospective homebuyer, rising dampness is not a phrase that anyone wants to hear concerning a home.
While this form of damp is a rare issue, it can be a costly one to fix. This is not a problem that a homeowner can ignore – and not just because the value of your property will be affected.
However, it’s also a problem that is frequently misdiagnosed with many assuming that simply washing down walls or painting over mould will eradicate the problem. It won’t.
And that’s because rising damp is not simply an issue with mildew or mould, it’s usually an indication of an underlying condition that will continue returning unless a course of action is put in place to prevent moisture coming up from the ground and into your property’s walls.
We bought an 1850’s rural property in 2021 and much of this article is based on our experiences with rising damp in that home.

Warning signs for rising damp
The warning signs for rising damp include:
- Damp masonry
- A bad musty smell
- Blistering paintwork
- Structural damage.
All homeowners should also be aware that damp will often create a noticeable brown or yellow tide line in the plaster above the skirting.
For those who do discover problems with rising damp in their home, then you need to speak with an expert to arrange treatment for it.
That’s because rising damp can cause damage to internal walls as well as structural damage to masonry and timber.
It’s also important to appreciate that rising damp will harbour mould and could result in health problems for those living in the property.
For this reason, a potential homebuyer will not want to see the prospect of having to deal with rising damp in their surveyor’s report and for homeowners, the tackling of rising damp is a problem that needs rectifying quickly.
There’s also an issue for landlords who should check their rental properties, particularly between tenancies, because the change in a room temperature or humidity levels can then affect the moisture that is being created. For example, this will be an issue in a room that was kept warm regularly but is then left cold for weeks or months.
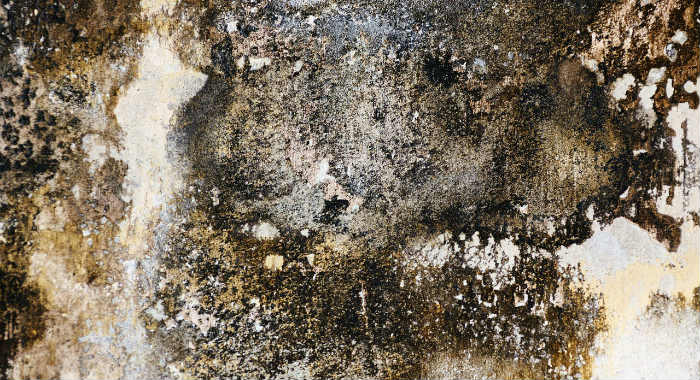
For us, the main warning sign was black mould spots along the skirting board an in the corners of our living room. The sellers had done a pretty good job at clearing the worst of it off before our viewing, but after we moved in it gradually got worse and we realised we had a case of rising damp.
What is rising dampness?

For those who do not know, rising dampness will begin at the bottom of a home’s internal wall and then move upwards.
The problem moves because of porous mortar, bricks and cement in the ground floor that will absorb any water found there – much like a straw.
This then leads to the internal wall becoming overly moist, which damages timber structures and will encourage the growth of mould.
The issue with rising damp is that it not only includes discolouration of the walls – the wallpaper and paint – but also can lead to the building’s foundations suffering with decay. There are also problems with heat loss from the property and there will be a foul odour which may affect your health.
Additionally, damp has been associated with various health complications. Notably, visible damp in a child’s bedroom was linked to increased respiratory morbidity (Ruffles et. al., 2024).
A damp proof course will help prevent water from being drawn up by the internal wall’s brickwork but these courses can become damaged and make a rising damp issue more likely if your home is particularly old.
It’s worth noting that homes in the UK built after 1875 have had to have a protective damp proof course installed.
However, it’s always better to double check.
A study on mortar samples derived from UK homes treated for rising damp determined that older homes had ph values between 7 and 14. These properties were also found to have higher sorptivity or capability to absorb water in specific conditons (Rirsch et. al., 2011).
Our home did have tanking slurry applied to the floor of the living room to help prevent rising damp, but it hadn’t fully resolved the issue. The problem for us was that the ground floor was lower than the outside floor level. This is actually quite a common issue in older properties.
This meant that the damp ground outside of the property was at a higher level than where our tanking slurry had been installed, leading to rising damp.
Rising damp signs

There is a simple way to identify whether your home has a rising dampness problem and that is to look at where the damp patches begin appearing.
Since rising damp will appear at the bottom of an internal wall, you will need to appreciate that most of the problem will be below ground, so then you need to inspect the tops of skirting boards.
This issue of rising damp will become apparent because the wood will be rotting and there may be the presence of mould. You should also take any notes of tide marks on an internal wall.
For example, the paint and wallpaper may begin peeling and the plaster may start crumbling.
Any stains in the plaster will be down to the ground water’s salt content which can leave a powdery residue.
We have all of these symptoms in our living room. As well as black mould spots directly above the skirting board, we also have salt stains further up. The plaster is also peeling in places too which means when we have solved the rising damp problem, we’ll need to give the walls some cosmetic attention too.
If you have different symptoms within your home, then you may be suffering with a different type of damp problem.
How do you fix rising damp?
Despite the fact rising dampness can be a widespread issue, there are no quick fix solutions when dealing with it.
Should you suspect that your property has a rising damp problem, then you should seek a second opinion from an expert.
And since you may want to avoid paying for unnecessary treatment, you should also seek third and fourth opinions since rising damp is misdiagnosed frequently.
That’s what we did. When we spotted some damp issues and the homebuyers report flagged up the same issues, we then instructed a specialist damp surveyor to do a report.
They concluded that we did have an issue and it was caused by the external ground levels being higher than the internal ground levels.
He recommended that to solve the issue we should try and lower the external ground level around the house.
If that isn’t possible, we can remove the existing plaster (which is damaged anyway) and coat the walls with a protective coating, then replaster with a special damp proofing mix. the cost should only be a little higher than having a normal replaster done and it can be done by any skilled plasterer.
In addition to the issues mentioned previously, rising damp may be down to problems caused by:
- faulty plumbing
- poor surface drainage
- blocked air bricks.
It’s also worth checking outside to remove or minimise potential moisture sources.
This means you should check for damaged downpipes, gutters or drains that may lead to water pooling on the ground.
If your property has an external water tap, then you could check the moisture conditions in the concrete by using a moisture meter.
The DIY rising damp treatment method
Once you have established that rising dampness is an issue in your home, you’ll need to quickly move to fix the issue. While it’s always recommended to at least consult a qualified damp specialist, there are also a number of DIY damp treatments you can apply.
Here’s our 3 step guide to fixing rising dampness the DIY way…
Step 1: Check damp levels

The first thing you’ll need to do is check where damp is actually causing an issue so you know the extent of your problem. There may be spots on the wall that are damp but are not yet showing physical signs.
That’s where a moisture detector comes in handy. By taking actual moisture readings of an internal and external wall you can see exactly where rising dampness is an issue and just how bad it is.
I love my damp meter (though my wife thinks I’m addicted to it!) as it’s such a quick way to check for damp. I’ve found you can sometimes trace the damp back right to it’s entry point to solved precise issues.
Keep in mind it’s always best to damp proof a wider area than is showing signs of damp. That’s because once you stop damp progression in one spot, it may force it into areas that were previously dry.
Recommended Product: Brennenstuhl Moisture Detector

- Moisture Tester to determine the moisture of wood, walls or other materials, such as, e.g. concrete, crick, screed, plasterboard, wallpaper
- Moisture Sensor with a measuring range of 5 -50% for wood, 1.5 - 33% for building material
- Moisture Detector with practical hold function allows measuring even in hard to reach places
Ease of use = Easy
If you’ve never used a moisture detector before, this one from Brennenstuhl makes the whole process easy. There’s a large LCD display that will give you a damp reading with the moisture level expressed as a percentage.
On the back of the device there’s a handy guide as to what percentage is classed as high, medium, and low levels of moisture depending on the material being checked. Keep in mind you’ll need a 9v battery which is not supplied with the device.
This is the damp meter we use (as seen in the photo above!) and we’ve found it to be very useful. There is a bit of a knack to using it and you have to be careful to use just the right amount of pressure to get consistent, accurate readings.
Also, watch out for the sharp points leaving marks on the wall. We’ve found ourselves having to touch up a few places where we took multiple readings due to the marks left.
Step 2: Install a damp proof barrier
Once you have established where you need to treat rising dampness, you’ll need to install some form of barrier that doesn’t allow moisture to pass.
It’s essential that this step is done correctly otherwise you will either not stop the damp, or you’ll simply move it to another part of your home.
That’s why it’s better to be over-cautious and treat a much larger area than you think you need to treat, and take care to install it at the correct level.
Of course, if your damp is being caused by external factors such as a leaking gutter or dripping external tap, you should fix the cause first. In many cases that may mean you do not need to take any further action.
Recommended Product: Dryrod Damp Proofing Rods

- Dryrod Damp-Proofing Rods Next Generation DPC - The most effective form of damp proofing for walls; outperforms creams, gels or liquids.
- Fast & Simple to Install DIY rising damp treatment. Less messy than older traditional damp course injection creams or liquids.
- No specialist equipment required - simply insert into 12mm holes in the mortar lines of a building to form a powerful waterproof barrier.
Installation Difficulty = Moderate
Longevity = 20+ years
Effectiveness = Excellent
One of the more recent innovations that has made damp proof treatments accessible to any DIYer is Dryrods.
The rods will, Dryrod say, outperform gels, creams and liquids to be an effective DIY rising damp treatment. To install, you simply drill 12mm holes along the mortar course and insert the rods. The special formula than spreads along the mortar to make a waterproof barrier.
In essence, it’s the next best thing to having a proper damp proof course but without the high costs and hassle of installation. For that reason, we rate it as one of the best damp proof treatments suitable for self-installation.
A study conducted by Agyekum et. al., (2018) also attests to the efficacy of damp proof coatings. In a span of four years, walls that were treated with this material fared better than those with polyethylene damp proof courses.
We used these rods in a previous home that had some damp issues, though we got a builder to install them since I didn’t have a drill bit of the right size and he was doing some work on our property anyway. It didn’t take him long to do so the bulk of the cost was in buying the product rather than the labour.
Step 3: Repair internal damage
Typically you won’t notice you have a rising dampness problem until damage has begun to appear on your internal walls. It can show itself as mould, staining, or unevenness on the plasterwork.
Unfortunately, it can take a long time (several months) to properly dry out a damp wall (ours took around 6 months!). Until it is completely dry you won’t be able to repaint it. In the worst cases, you may need to replaster the wall.
If you have any doubt as to whether there is still damp in the wall, or you want to make absolutely sure the wall is protected if any damp re-appears, you’ll need to seal it before repainting or repapering.
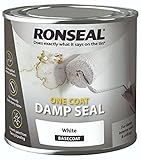
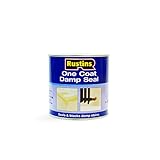
Recommended Product: Polycell Damp Seal
No products found.
Typical Cost = £13-18 per litre
Installation Difficulty = Easy
Effectiveness = Good
As the final step of fixing your damp issues, the No products found. does an excellent job at stopping further damp issues and is a fraction cheaper than some other brands such as Ronseal.
It has a smooth one-coat finish that means you can soon repair and paint or wallpaper over the damaged area. In fact, it gives a soft sheen white finish so, if that’s what you’re after, you won’t even need to paint over it.
Alternatively, you can view our 5 best damp seal paint options.
What to do instead if you have penetrating damp
If you’re in a position where you have damp but it appears to be penetrating (coming sideways through the wall) rather than rising (coming up from below) then you’ll need to treat your damp slightly differently.
You may still find a moisture detector and the damp seal useful, but instead of Dryrods, you’ll want to look at fixing the cause and then sealing the external wall. Doing so will prevent re-occurrence of the issue.
Recommended Product: Drybase Liquid-Applied DPM

- High-Strength damp-proof barrier highly effective against moisture ingress and ground gases in floors and walls.
- Excellent Adhesion and Drip-Resistant Properties - water-based and bitumen-free.
- Versatile damp proof membrane - Can be used on a large range of substrates such as brick and timber.
Typical Cost = £13-18 per litre
Installation Difficulty = Easy
Effectiveness = Good
The Drybase liquid damp proof membrane (DPM) is a paint that is applied to the external wall that helps prevent any water soaking through your brickwork.
Before applying you should ensure the brickwork is in good condition and there are no cracks or holes where water could penetrate. Then just apply like you would any other paint. One litre will cover around one square metre of wall.
The most common cause of damp
In the UK, condensation tends to be the most common cause of damp in cold winter months so you need to look carefully at this.
The issue with internal condensation may lead to structural dampness which is an unwanted and excessive amount of moisture within your building’s structure and not just the foundations.
Condensation can be caused by:
- Steam from white goods such as washing machines
- Cookers
- Heaters.
It’s also worth noting that with structural damp, the issues with moisture can come at varying heights or even above the ground, from the ceiling, for example.
Essentially, this means that only rising dampness will come from the ground underneath the building or walls of a property.
It’s also worth checking pipes for damage since these may cause patches of damp to appear in an internal wall along with leaking guttering.
Also, in a bid to find out the source of rising damp, you should check all of your property’s external walls to see whether they are damaged and are letting in rainwater.
How do you treat rising damp on internal walls?
There are measures that will help your property to ‘breathe’ and these will help control any potential for rising damp spreading through your home’s internal walls.
One of the potential solutions is to retrofit a damp course and while waiting for this treatment to work, you’ll need to ensure that your property is properly ventilated.
In older properties, ventilation is particularly important, especially if there have rising damp issues in previous years.
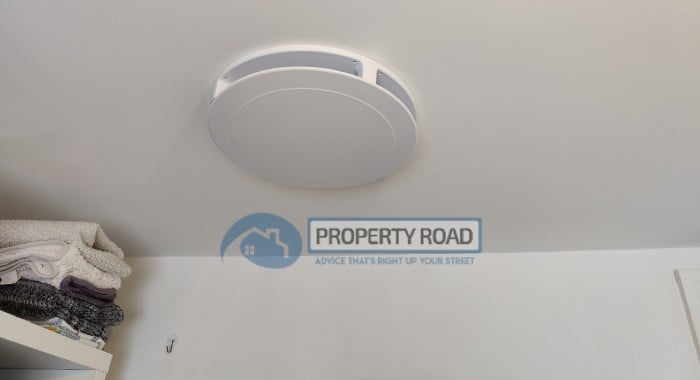
We have a positive pressure ventilation system installed in our home to help improve the air and humidty levels in our home.
It’s also important to ensure that air is able to circulate freely in the cellar, should your property have one, as well as on the ground floor.
This may also be the point to remove rubber-backed carpets or vinyl flooring and replace these with a breathable material.
This material will then enable fresh air to circulate and help dry out any damp internal wall.
It may also be worth investing in dehumidifiers and extractor fans to keep the levels of humidity within your home as low as possible.
Best rising damp treatment
While many homeowners with a rising dampness issue will be looking for the best solution, there is no number one product since there are so many reasons for the damp to be appearing.
You can, and should, maintain the damp proof course or boost it with commercial products such as the aforementioned products.
For those seeking a long-term solution to a rising damp problem, then you’ll need to check your damp proof course on a regular basis.
This damp proofing is the barrier between the ground and your home and usually consists of a tough material that is found about 6-inches above the ground and is visible on exterior walls.
Damp proof course can be compromised
The damp proof course can be compromised should the ground level be raised above the course – for example, adding a new driveway – which then means that any groundwater will be higher than the damp proof course itself, so water will penetrate the brickwork.
This is our main issue in our old home and we’ve also experienced the same issue in a previous home we owned so we assume it’s quite common.
One potential way of resolving this issue is to dig a ditch alongside any obstruction so the ground level is no longer above the damp proofing though you will need to ensure the ditch is always well-drained because once it fills with water you could make the problem worse.
Another effective way to eradicate rising damp is to have a damp proof membrane installed.
Search for the source of a damp proof problem
It’s important that when you search for the source of a damp proof problem, that you also check:
- Does your neighbour’s property have a higher damp proof course than yours?
- Do you have any ramps or structures, such as a coal bunker, that meet your property’s external wall at a place higher that your damp proof course?
- Do you have any internal bridging structures, such as stairs, cupboards or fireplaces that have been placed higher than the damp proof course in the cavity wall?
After checking to see whether the ground level is higher than the damp proof course, and you have found it is not, then you need to check internal wall cavities because:
- Cavity walls can become blocked with debris
- This debris will act as a means to carry any water above the damp proofing
- And from there into the internal wall.
If this is the problem, then you’ll need to deal with experts because bricks will need to be removed so the debris can be removed from the cavity.
One particular issue is if your damp proof course gets damaged, then you’ll need an expert, particularly one with experience, to fit a new one.
All damp proof courses must go under the entire property and there should be no breaks within it.
To ensure your internal wall is dry, you may need to replace damaged and damp timbers as well as brickwork.
Depending on the most appropriate treatment, the repair costs could be substantial but this will be down to the rising damp damage.
Does home insurance cover rising damp?

Unfortunately, you will find that most home insurance cover will not extend to dealing with rising dampness and condensation.
The issue is that when you buy home insurance, there will be a list of assumptions that you will agree to and among these will usually be a claim that your home is ‘in a good condition’.
That’s why most buildings and contents home insurance policies will not repair the damaged caused by condensation and rising damp.
For more guidance on this problem, the Royal Institution of Chartered Surveyors issued a summary of the risks to buildings and essentially if your home does have rising damp, then it should be not considered to be in a good condition.
This is also the point to highlight that failing to tell your insurer of rising damp could lead to your home and buildings insurance cover being invalidated.
However, there are some insurers who do offer specific cover for issues with rising damp, but it a better idea to carry out regular home maintenance to help lower the likelihood of having rising damp issues and, consequently, expensive repair bills.
Let’s face it, there’s no place like home where we feel happy and secure but rising damp problems can certainly put a dampener on that experience if you’ll excuse the pun.
This means it’s best to act quickly when you spot the signs of damp, determine the cause and then go about fixing it. Whether the problem has a DIY solution, or if you need professional help, prompt action will help prevent a heftier bill further down the line.
The 5 Best Damp Seal Paints Currently Available


The products or services listed on this page have been independently tested by our team. We may earn a commission from the affiliate links on this page.