Turfing a lawn is a pretty simple and straight-forward task. Nonetheless, it does involve some hard work and sweat.
At the end of the day, however, you will end up with a beautiful and perfect lawn that is easy to maintain. Follow the steps below when turfing your lawn:

Tools You Need
Depending on the turf you buy and the area you want to work on, you will need different tools. The most common are the following:
- Straight edge
- Spirit level
- Garden gloves
- Heavy roller
- Organic additives
- Fertilizers
- Garden spade
- Garden hose
Types of Turf
Before deciding on the type of turf, there is a few things to take into account – the level of shade you get in your garden, how much you’re going to walk on it, and how much maintenance and watering will be required.
Traditional Turf
Traditional turf is a mixture of lawn grasses. You can identify it by its deep green colour with a nice even texture. Also, if you look closely, you’ll observe fine-textured and some slightly wide leaves.
You can use it for general landscaping, golf courses, play areas, front and back lawns.
Fine Turf
Fine turf is neat and velvety like the grass you can see on bowling greens, for example. It consists of needle-thin leaves, which should be mowed very close to the ground.
It requires the most maintenance.
You can use fine turf for bowling and golf greens, and ornamental and prestige lawns that are not going to be trodden on too much.
Shade Tolerant Turf
This type is usually slightly lighter green in colour than the rest. It grows slower and requires less mowing and watering.
Shade Tolerant Turf usually has only one grass species, so if you look closely, all stalks will look the same.
You can use shade tolerant grass for shaded lawns, play areas, golf courses, orchards and other wooded areas.
Wildflower Turf
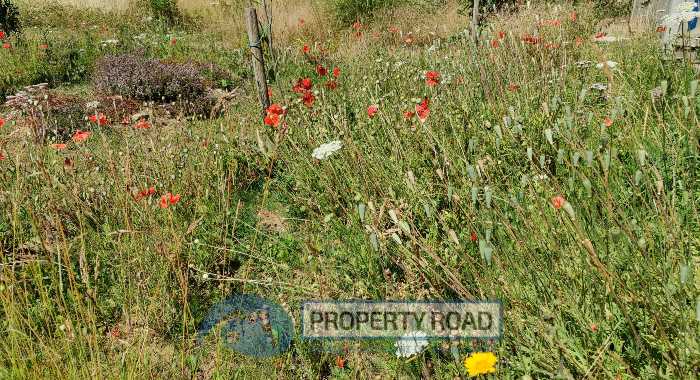
Wildflower looks pretty ordinary at first. However, there are many different plant species that it consists of, which you will notice in several weeks. It grows to between knee-height and waist-height with wildflowers in it.
That’ll definitely attract bees, grasshoppers and birds, which will infuse your garden with their buzzing and songs.
In an experiment at King’s College in Cambridge, a portion of a historic lawn was converted into an urban wildflower meadow. It had three times more plant species, spider and bug populations, and bat sightings than the remaining lawn (Marshall et al., 2023).
Across the pond, a study conducted by Wolfin et al., (2023) focused on wildflower plots in parks within Minnesota, U.S.A. were found to promote more diverse bee populations.
We converted most of our garden into a wildflower meadow in 2021/22 and we absolutely love it. We added yellow rattle to ours since it’s a parasite for grass. That means it helps to keep the grasses down to ensure the wildflowers can grow without being out-competed.
Don’t assume that a wildflower garden is not hard work, though! While it’s true you don’t have to mow it, you will need to cut it back at least once per year. Ideally, you’ll do this using a scythe and remove the cuttings. This helps to stop the soil nutrients getting too high (wildflowers prefer poor nutrient soil).
We do half of ours in spring, and the other half in autumn. By cutting at different times we ensure there’s always part that has a good level of growth which is great for the wildlife. It also means you get slightly different flowers emerging in the two areas depending on when they were last cut back.
We have noticed a massive increase in the number of birds, insects and other wildlife since we switched to wildflowers and can thoroughly recommend it!
You can use wildflower turf beside a bond, for wildlife gardens, slopes and banks, school premises (as a study area) and public areas.
Choose Your Turf
There are many places to order turf in the UK. Some are specially made for golf courses and sports arenas, others – for garden landscaping. The first ones contain fescue grasses and bentgrasses. They are commonly known as fine turf and they look beautiful when properly taken care of.
However, they require a lot of maintenance and are not worth it for general use such as in your own garden.
In such cases, choose grasses that include ryegrass or poa supina. Poa supina is newly introduced type of grass that does well in shade and it is one of the shade tolerant types.
When buying, make sure you examine it carefully. It should be moist and the grass – green. It should smell fresh and earthy. Don’t settle for yellow grass or slightly decayed turf – those are signs that it is not as fresh as it should be.
Prepare the Ground
Before you order, you’ll first need to prepare the ground! Doing this will allow you to double-check the quantity you will need. Moreover, as soon as it is delivered, you need to lay it on the ground as it decays fast. By preparing in advance, you will avoid wasting any.
Autumn and spring are the preferred seasons for laying new turf. These are the times when it rains the most, helping it to establish its roots.
Step 1:
Firstly, clear the area by removing debris, old vegetation, sticks, rocks and anything else that might be on the way of laying the new turf.
This is when you can also test your soil pH to adjust its minerals if necessary. The soil pH should be between 6.0 and 7.2 for the grass to grow healthy.
Step 2:
Secondly, dig the area about 15 cm in depth. If you realize that you there’s not enough topsoil or the soil is of poor quality, order good quality topsoil and lay it down. It’s way harder to work on improving your soil after you have laid the lawn.
Step 3:
Thirdly, break up any lumps by raking the soil over. Then, level the soil by flattening it in a way that it forms a firm surface that won’t break down when you walk over it. You can use straight-edge and a spirit level for levelling the soil area and a heavy roller for compacting the soil.
Step 4:
Finally, rake over the soil one more time but this time lightly. The goal is to get a nice crumbly soil texture. Now, you can also apply a pre-turfing fertilizer.
Order the Turf
It’s time to order, once you’ve fully prepared the area. Measure the length and width of your future lawn and multiply the two numbers to get the area. The result is the turf you need to order.
It’s usually sold in square meters – one roll equal one square meter.
We advise ordering 5% more than you actually need because it gives you room for trimming and fixing mistakes. If you have a circular or curved lawn – order 10% extra.
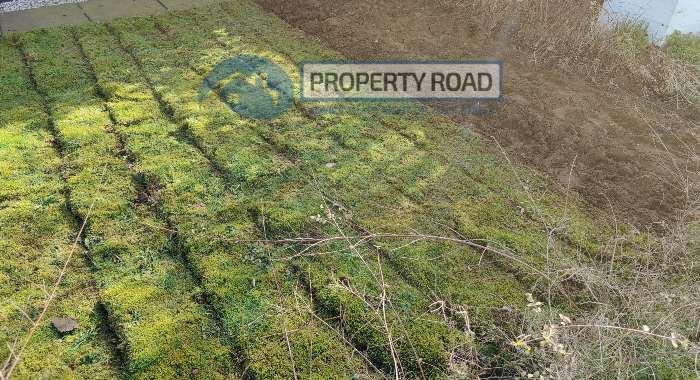
Laying the Turf

Once you have received the turf, it’s time for the hard part – laying it. Make sure you start the process as soon as you receive it.
Start by watering until the soil gets fully wet. This will help it to establish itself quicker.
Then begin laying the turf along the edge that is furthest away from your house. Thus, you can work backwards and avoid stepping on it.
Laying the turf itself is as simple as unrolling each square and gently placing it on the ground. Press it down with your hands to help the roots get good contact with the soil. If you prefer, you can use a roller to push it into the soil.
Place each piece as close as possible to the previous one. You shouldn’t be able to see soil between individual pieces. Depending on the shape of your garden, trim it if needed to fit perfectly the edges.
This is what the lady who had owned our previous house had done and the lawn always looked lovely after we cut it.
Watering the New Turf

Now, that the hard work is done, you should immediately water the new lawn. Make sure you water it thoroughly as it’s crucial to get water into the soil beneath the turf.
You can gently lift a corner of a square to check if it’s soaking and water has reached the soil.
Water the new turf one a day for the first ten days. Reduce watering to every other day when it starts to establish its roots in the ground and gradually stop watering at all. As 2-3 weeks pass, you can mow the lawn for the first time.
One thing we learned was to never cut the lawn too close to the soil. Doing so can cause damage to the grass and can create bald patches that moss and other weeds then populate. This is particularly when the ground is wet.
The final piece of advice is to avoid walking on the new turf until the roots are fully established. To check that, gently try lifting a corner. If it sticks to the ground, your turf has grown its roots into the soil.
As you can see, turfing a lawn is not a difficult job, but it does require some knowledge and preparation. This will ensure a perfectly lush and green garden that you and your whole family can enjoy!